Most paint cans sold in Indian hardware stores never mention that anodized aluminum is one of the hardest surfaces to get paint to stick to permanently — and that single gap in labeling explains why so many DIY window painting jobs peel within a year. Anodizing creates a dense, non-porous oxide layer on the metal’s surface specifically to resist corrosion and wear, which is exactly why it also resists the adhesion that ordinary paint depends on. Painting anodized aluminum window frames at home is entirely possible, but it only holds up long-term when the surface prep accounts for that resistance rather than treating the frame like any other painted surface around the house.
This matters more in India than in many places, since aluminum window frames are everywhere — from budget housing to premium apartments — and repainting rather than replacing is often the more practical choice once the original finish has dulled, faded, or simply stopped matching a renovated interior.
Why Anodized Aluminum Resists Paint Differently Than Powder-Coated Frames
Not all aluminum window frames are finished the same way, and this distinction changes the entire painting approach.
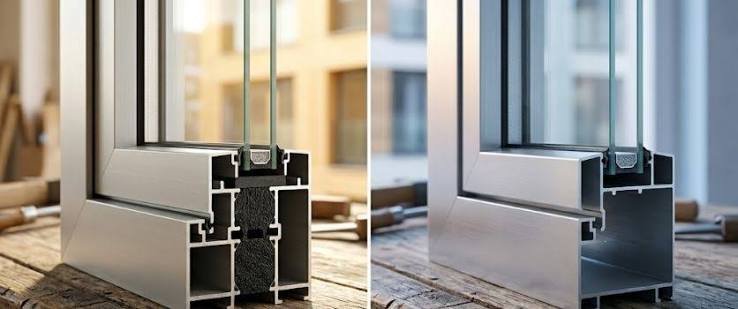
- Anodized frames have the protective layer grown electrochemically out of the aluminum itself, creating an extremely hard, smooth, and non-absorbent surface — this is the harder finish to paint successfully.
- Powder-coated frames have a separate paint-like layer baked onto the metal, which is comparatively easier to repaint since it’s already a coating rather than a treated metal surface.
- Anodized surfaces often have a slightly metallic sheen (silver, bronze, or black tones being common in Indian residential buildings) that paint needs to fully cover, unlike matte powder coats that hide undercoat more easily.
- The smoothness that makes anodizing attractive and low-maintenance is precisely what makes mechanical paint adhesion difficult without proper preparation.
Knowing which finish is on the frame before starting determines how aggressive the prep work needs to be — anodized surfaces need more deliberate surface preparation than most homeowners expect.
What You’ll Need Before Starting
Gathering the right materials upfront avoids the most common cause of failed DIY paint jobs: switching to whatever’s available midway through.
- Etching primer specifically formulated for metal or aluminum surfaces — this is non-negotiable for anodized aluminum, since standard primers won’t bond reliably.
- Fine-grit sandpaper (320-400 grit) for scuffing the surface without gouging it.
- Degreaser or mild detergent solution to remove oils, dust, and residue before sanding.
- Painter’s tape to mask glass, rubber seals, and adjoining wall surfaces.
- Exterior-grade enamel or acrylic paint rated for metal surfaces, ideally one formulated to handle temperature fluctuation if the frame gets direct sun.
- Clean lint-free cloths and a tack cloth for removing sanding dust before priming.
- A quality synthetic-bristle brush or a fine-nozzle spray setup, depending on whether the job is done by hand or with basic spray equipment.
Skipping the etching primer specifically is the single most common reason anodized aluminum paint jobs fail within months rather than lasting years.
Step-by-Step: Preparing the Surface
Surface prep accounts for most of the difference between a paint job that lasts a decade and one that starts peeling within a monsoon season.
- Clean thoroughly first. Wash the frame with a mild detergent solution to remove dust, pollution residue, and any grease, then rinse and let it dry completely — painting over any residue guarantees poor adhesion regardless of what primer is used.
- Sand the entire surface lightly. Use 320-400 grit sandpaper to create fine scratches across the anodized layer, working in consistent strokes rather than random scrubbing; the goal is a uniformly dulled surface, not visible scoring.
- Wipe away all sanding dust. A tack cloth or slightly damp lint-free cloth removes fine particles that would otherwise sit under the primer and create a rough, uneven finish.
- Mask everything that shouldn’t be painted. Glass edges, rubber seals, and wall surfaces adjoining the frame need clean painter’s tape lines — rushing this step is where most amateur paint jobs visibly show their edges later.
- Check for existing damage. Any pitting, corrosion spots, or old peeling paint needs to be addressed separately (light sanding or filling) before the main priming step, since painting over damage just hides it temporarily.
Step-by-Step: Priming and Painting
Once the surface is properly prepared, the actual application matters less than most homeowners assume — the prep work has already done the heavy lifting.
- Apply etching primer in thin, even coats. Two thin coats bond better than one thick coat, which tends to run or pool, especially on vertical frame sections.
- Allow full drying time between coats, following the product’s specified window rather than rushing based on how the surface looks or feels — anodized surfaces can appear dry on top while the primer underneath hasn’t fully cured.
- Apply the topcoat in thin layers as well. Two to three thin coats of exterior-grade enamel or acrylic paint give better durability and a smoother finish than one heavy coat.
- Work in sections rather than the whole frame at once, particularly for larger sliding windows, to maintain even coverage and avoid visible lap marks where wet paint meets already-drying paint.
- Avoid painting in direct sun or high humidity. Early morning or late afternoon, outside of monsoon season, gives the most reliable curing conditions — humidity slows curing and can trap moisture under the paint layer.
- Remove masking tape while the final coat is still slightly tacky, not fully dry, to get clean edges without the tape pulling at cured paint.
Common Mistakes That Cause Paint to Peel Prematurely
A few recurring errors account for the vast majority of failed DIY jobs on anodized aluminum specifically.
- Skipping sanding entirely, assuming a “clean surface” is enough preparation — anodized aluminum’s smoothness needs mechanical roughening, not just cleaning, for paint to grip properly.
- Using a general-purpose primer instead of an etching primer, which doesn’t chemically bond to the anodized layer the way etching formulations are designed to.
- Painting over old, already-peeling paint without stripping it first, which just adds a new failure point on top of an existing one.
- Rushing dry times between coats, especially during humid months, which traps moisture and causes bubbling or cloudiness that appears weeks after the job looked finished.
- Choosing interior-grade paint for exterior-facing frames, which lacks the UV and weather resistance needed to survive direct sun and monsoon exposure over multiple years.
Maintaining a Freshly Painted Frame
The work doesn’t end once the paint has cured — a few habits extend how long the new finish actually lasts.
- Avoid abrasive cleaning on the newly painted surface for at least a few weeks after the final coat, giving the paint time to fully harden.
- Once cured, clean with a soft cloth and mild soap solution, the same approach used for unpainted aluminum frames, avoiding anything acidic or alkaline that could degrade the paint layer.
- Touch up small chips or scratches promptly rather than letting them sit, since exposed spots are where moisture and corrosion can start working under the surrounding paint.
- Reapply a fresh topcoat every 4-6 years for frames in high-sun or high-humidity exposure, even if the paint still looks intact, since UV degradation often weakens the finish before visible peeling starts.
When DIY Painting Isn’t the Right Call
Despite being achievable at home, a few situations are better handed to a professional or reconsidered entirely.
- Frames with significant pitting or corrosion underneath the anodized layer need proper metal treatment before painting will hold, which is harder to judge and execute without experience.
- Large-scale jobs covering many windows across a full house benefit from spray equipment and professional-grade primers that achieve more even, durable results than brush application at scale.
- Frames under warranty from the original installer or builder, where DIY painting could void coverage for other frame-related issues.
- Anodized frames in premium or heritage-style properties, where an uneven or visibly amateur paint job would noticeably affect the property’s appearance and value.
Frequently Asked Questions
Q1. Can I paint anodized aluminum without sanding it at all, using a special “no-sand” primer?
Some no-sand or adhesion-promoting primers exist and can work on mildly weathered anodized surfaces, but for frames with an intact, glossy anodized layer, light sanding still gives noticeably better long-term adhesion than skipping it entirely.
Q2. How long should I wait after painting before closing and opening the window normally?
Give the final coat at least 3-5 days of full cure time in normal weather before regular use, since the paint may feel dry to the touch within hours but hasn’t fully hardened against the friction and pressure of sliding mechanisms yet.
Q3. Is it possible to change the frame color significantly, like going from silver to black, or does anodizing limit color choices?
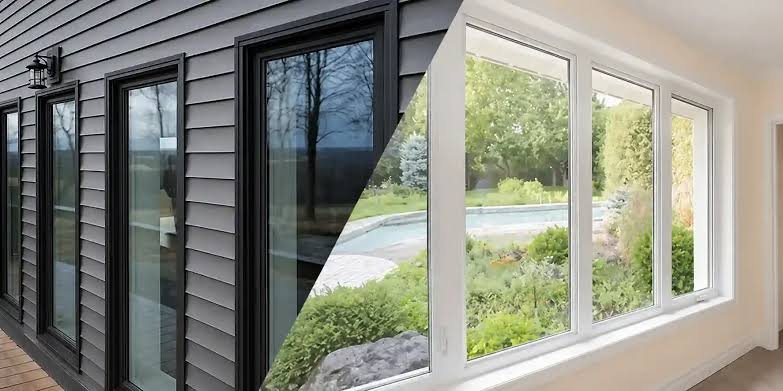
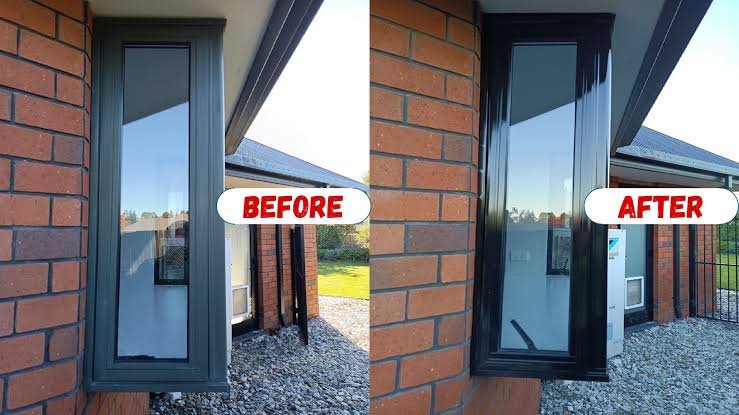
Once properly primed with an etching primer, anodized aluminum can be painted virtually any color, including a dramatic shift from silver to black or another tone — the anodized layer affects adhesion, not the range of colors that can be applied on top of it.
Q4. My frame has small rust-colored spots — is that actually rust, and does it affect the painting process?
True rust doesn’t form on aluminum itself, so those spots are more likely surface corrosion or contamination from nearby iron fixtures (screws, grilles) that has stained the aluminum; these spots need to be cleaned and lightly sanded down before priming, since painting directly over them will telegraph through the new coat over time.